It’s apple season in my hometown! It’s the time of year when I step into the brisk fall air and crave a fresh cup of apple cider, a bowl of hot apple crisp, or (you guessed it!) a serving of fresh homemade applesauce. If you’ve ever tasted homemade applesauce then you know the store bought stuff holds no comparison to the naturally sweet, fresh taste of applesauce made in your own kitchen.
I used to think that learning how to can applesauce was a daunting task until I decided to give it a go one year. I discovered that it’s really not too difficult to do! For the last couple of years making homemade applesauce has become a family affair for us. All of the women (and sometimes a few of the men) on my side of the family will get together for a day and crank out a bulk batch for the year. It works great for us to do it this way and spread the work between us all, but you don’t have to dedicate a whole day to the process if you just want to make smaller batches on your own. The steps for how to can applesauce below work for small or large batches – you choose how much you want to make!

My daughter even offered her “help”!
(Note: This post contains affiliate links which means that I make a commission on items that you purchase through my links – at no additional cost to you! Read my full disclosure here.)
The first year that I made my own I attempted to learn how to can applesauce, but I didn’t use a water bath to seal my jars and failed. The next couple of years I decided to just freeze my applesauce in quart size freezer bags. If you don’t have the equipment or don’t want the extra work of the canning process, applesauce keeps great in the freezer. I just thawed a bag each time I wanted more and would dump it into old pasta sauce jars to keep it in the fridge until it was eaten. Applesauce holds its taste great canned or frozen.
For us this year freezer space was at a premium, so we decided to go with the canning process again. This time we were able to borrow a water bath canner and the process went smoothly and well!
If you’re considering learning how to can applesauce it’s really not a difficult task. You will be glad when you have a pantry full of the fresh homemade side dish at your disposal!
In a 12 hour day the ladies in my family canned about 100 quarts of applesauce this year. Below is how we did it.
Here’s a step by step guide for how to can applesauce:
1. Buy your apples and jars
The first step in learning how to can applesauce is to get some apples!
If you live near an apple orchard then buying apples in bulk should be easy. We have a few orchards nearby so we were even able to compare prices between some of them. I typically call the orchard and put in an order for their “seconds” of apples. These are the apples that might have a few blemishes and therefore were not good enough for them to sell in their shop. They’re great for applesauce because they are cheaper and it’s easy to just cut out any of the bad spots. We discovered this year that one half bushel of apples equals approximately 12-13 quarts of applesauce. We ordered 8 half bushels to make 100 quarts. If you are doing a small batch and only need a half bushel or two you might not even need to order your apples ahead. Most orchards probably have stock to accommodate a smaller purchase without ordering ahead.

I’ve experimented with different kinds of apples for my applesauce. One year I had great success using only galas, but the next year using only galas did not taste great. (Galas are not typically used for applesauce but since I had great success with them one year I had decided to try again.) This year we used a blend of seconds from the orchard and it had a deliciously sweet taste. I recommend just asking your orchard for a blend of multiple kinds of apples unless you want to experiment to find your own favorite mix.
If it’s your first time learning how to can applesauce, you will need some jars. We used a mix of wide mouth and regular mouth ball jars. The jars are available on Amazon or at your local grocery store. In my hometown they can even be found at a few of the local hardware stores. If you’ve canned in the past and have enough jars then you will just need to purchase new lids for them since the seal portion of the lid for each jar cannot be resealed once they’ve been used.
2. Wash your jars.
It may seem like an assumed task, but the second step in learning how to can applesauce is to wash your jars!
Before you begin making your applesauce be sure to clean your jars in hot soapy water so they are sanitized and ready to be filled and stored.
3. Cut your apples.
When you are ready to begin making your applesauce you will need to start by cutting your apples. Since the applesauce will be strained in the cooking process, this step is really easy. You don’t need to cut out the core or stem – just chop each apple into pieces. I usually aim for chunks that are about an inch thick. The smaller the pieces the quicker they will cook and the bigger the pieces the longer they will take. The important thing is to keep most of your pieces close to the same size so your cooking time for the applesauce will be relatively standard.
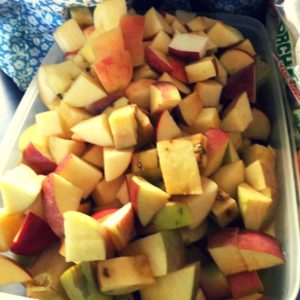
Our cut apple pieces
4. Boil your apples.
Once you have enough apples cut to fill 3/4 of a cooking pot then you can begin to cook some of the apples while you continue to cut the rest. We used two pots at a time to cook on the stove to speed up the process.
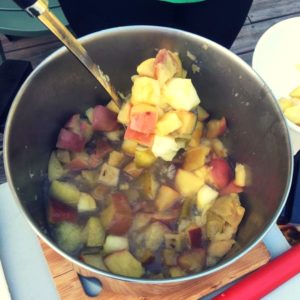
Our almost ready apples cooking
Fill your pot(s) 3/4 full with your cut apples. Add an inch or two of water and heat on medium high. Stir the apples occasionally until they are a soft fully cooked texture.
5. Setup your strainer.
The fifth step in learning how to can applesauce is to setup your strainer.
When your apples are cooked they will be ready to run through the strainer, so it’s a good idea to get your strainer set up while your first round of apples cooks on the stove. There are a few different options for straining your applesauce. The first year that I made applesauce I used an attachment for my KitchenAid mixer. It was a slow and very time consuming process for me, but with a little bit of recent research I see that there are newer and probably more efficient KitchenAid attachments available. Every year since my first I have used a Victorio Strainer to strain my applesauce. These strainers work like a dream and seem to almost magically turn full pots of cooked apples into deliciously smooth applesauce!
If you plan to make applesauce on more than one occasion, I highly recommend the investment in a Victorio Strainer.
6. Run your cooked apples through the strainer.
Whichever type of strainer you choose to use, the next step is to run your cooked apples through it. If you are using a KitchenAid attachment this is done by scooping spoonfuls of apples into the top funnel and running the grinder to push the applesauce through. If you are using a Victorio Strainer make sure you have a bowl or container positioned under, and at the end, of the filter on your strainer to catch the applesauce and the apple remnants. Then dump or spoon your cooked apples into the top funnel on the strainer. Push them down with the paddle provided as you crank. You will see smooth applesauce pour out underneath your filter while all of the apple skins and cores are pushed out into your bucket at the end of the filter.
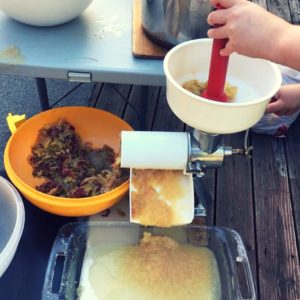
Running our apples through the Victorio Strainer
Continue this process with your cooked apples while moving on to the next step.
7. Spoon your strained applesauce into jars.
The seventh step in learning how to can applesauce is to spoon your strained applesauce into jars.
As you get finished strained applesauce, you can begin to spoon or funnel it into your canning jars. This can be done while the applesauce is still hot. Fill jars up to about an inch from the rim and top them loosely with a lid. It’s a good idea to soak your lids before placing them on top of each jar to help soften the rubber seal. As you fill and loosely top each jar set it aside on the table until you are finished cooking and straining your remaining apples.
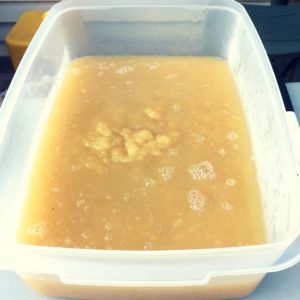
Fresh hot applesauce ready to be put into jars.
If you are freezing your applesauce rather than canning, then you are almost done at this step! Just spoon your strained applesauce into freezer bags, seal them, and let them cool. When they are cool you can throw them into the freezer and they are ready to thaw and eat!
8. Tighten lids & prepare your water bath canner.
When all of your apples have been cooked and strained and your jars are full with loose lids you are ready to begin sealing your jars. I tried this my first year without using a water bath sealing method. Half of my jars didn’t seal and went bad so I highly recommend investing in a water bath sealer for canning to be sure your jars reach the temperature and pressure they need to fully seal. You can purchase a water bath sealer on Amazon or you may find one at a local kitchen supply store.
Tighten the lids as tight as you can on all of your filled jars. Fill your water bath pot so that the water will just cover the top of your jars and place it on your stove. Heat it on high heat until the water begins to boil. Once boiling, use tongs to lower your jars into the water bath. Allow the water to return to a boil, cover, and let the jars sit in the boiling water for at least 15 minutes.
After 15 minutes use tongs to remove your jars from the heat. We placed them on a rimmed cookie tray as we took them out to easily transport them as a batch. As soon as you remove one batch place another batch of jars in the boiling water and repeat the process until all of your jars have been through the boiling process.
9. Seal your jars.
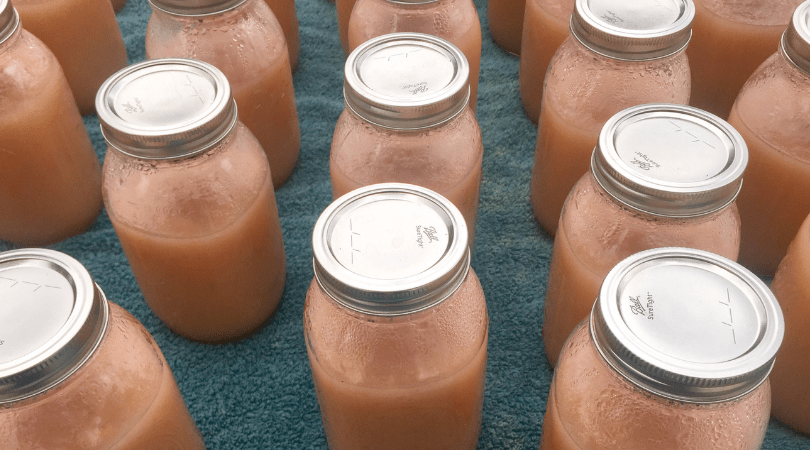
As soon as you remove a batch transport the jars to somewhere where they can sit for 24 hours or more. We setup a table on our back porch and spread them all out on top of towels. After each batch came out of the water bath we carried the tray out to the porch and used an oven mitt to place them on the towels. Leave a little bit of space between them to allow them to cool more quickly. Once your jars are transported simply let them sit to seal and cool for up to 24 hours. You will hear a popping sound as each of the jars successfully seals.
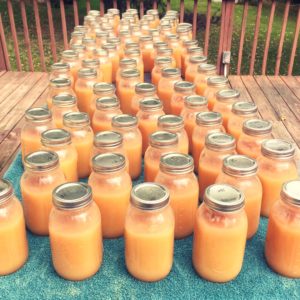
Our finished jars cooling on the back porch.
After 24 hours check your jars to see if they have all fully sealed. You will know that your jars have sealed properly if the lid does not have any give when pressed.
When you have checked your jars to ensure they are sealed they can be moved into the pantry.
Your delicious homemade applesauce is ready to be stored and consumed! You have officially learned how to can applesauce!
(If you have a little one at home, homemade applesauce also makes great baby food! However, my daughter had difficulty choking on the thickness of it when she was less than one year old. Put some finished applesauce in the blender until it is a fine smooth consistency and you also have homemade healthy baby food!)
Read more of my favorite food prep ideas and recipes here:


Trackbacks/Pingbacks